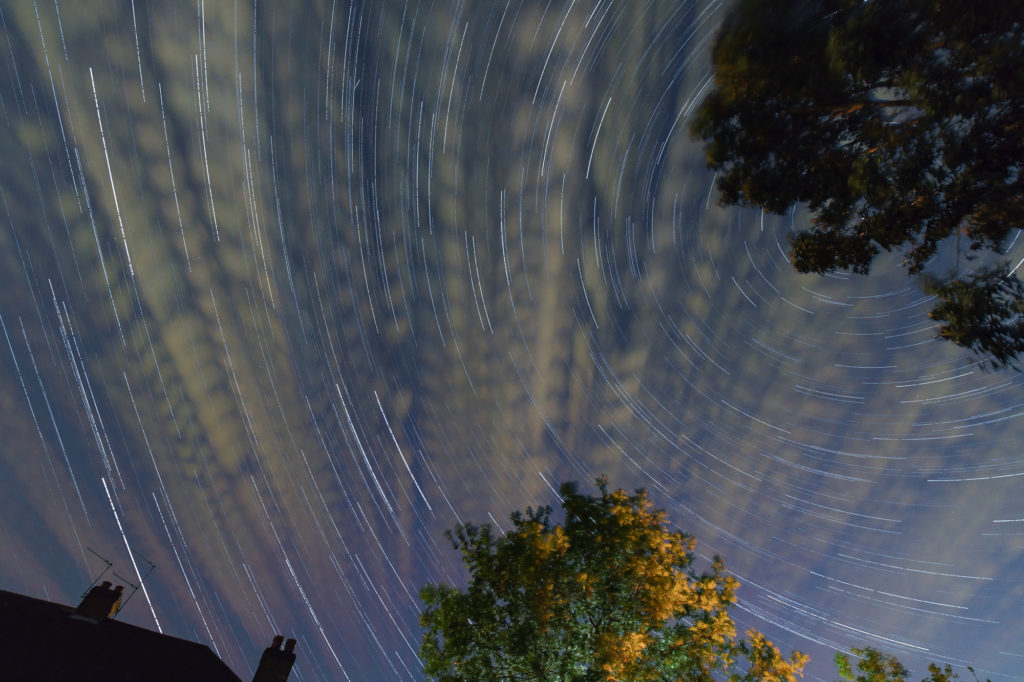
Welcome to another tutorial, this time we are going make a star trail photograph like the one above which I took on the peak of the Lyrid meteor shower on the 21st April 2020. Also includes one meteor that I picked up.
There are many ways to create this but I have found the following as the best way, first of all, you need to take a number of photographs and then use the software called StarStaX (free) which will create the trails.
Equipment needed
- DSLR camera or equivalent, even a mobile phone that you can control the camera in manual mode and export in RAW.
- Tripod
- Remote to trigger the camera (optional)
- Torch with a red filter, the red so that it doesn’t affect your eyes when switching it on, especially as your eyes have got accustomed to the darkness.
Taking the shots
- Point your camera in a northerly direction as ideally, you should want the north star at the centre of your photograph. This point hardly moves so all the stars will move around this point when you do the star trails.
- Choose a good location to compose your shot. Ideally, it would have some foreground elements like trees, building etc.
- Place your camera on your tripod.
- Depending on how dark the skies are in your area, these settings are a starting position. The settings are for an hour after sunset and beyond.
Set your camera to the following ….
Change the output image to RAW or RAW + JPG.
DSLR Camera on Manual mode so you have full control of the settings. You need to focus on a distant object or set your lens to focus to infinity. Then change it to manual focus this locks the focus, once this has been set you wouldn’t need to change it again for the star trails.
The ISO at 1250 which makes it more sensitive to light, though the sky needs to be dark. You want as little noise as possible, but if your camera is one of the latest models then you could choose a higher ISO.
Your F stop at f8 to let enough light in through the aperture and increase the focus plane.
The shutter speed should be 20 seconds. The reason for 20 seconds is that the earth is moving and around 20 seconds will keep the stars as a point of light. The exact calculation for the length of time is also dependent on your lens and the 500 rule calculation can be used.
Full Frame : 500 / focal length of lens
Crop Sensor : 500 / focal length of lens / 1.5 (1.6 for Canon) - Set a 2-second delay on your camera in case it vibrates when the shutter is activated.
- Connect your remote or use the timelapse setting on your camera if it has it. Otherwise, you can press the shutter button and use the 2sec delay to minimise vibrations.
- Wait 5 seconds between each shot (total 7 including 2-second delay)
- Take at least 15o shots, ideally 350 continuous shots. Minimum it will take 1 hour up to 2.5 hours roughly.
- Take one shot with the cover on the lens, this is the dark shot. It is used to remove the noise from the sensor from the final image.
Post Production
You should now have at least 150 shots plus the dark shot in RAW format, import and edit them in your favourite image editing software. I use Lightroom as it is fast to catalogue and quick to edit the photographs.
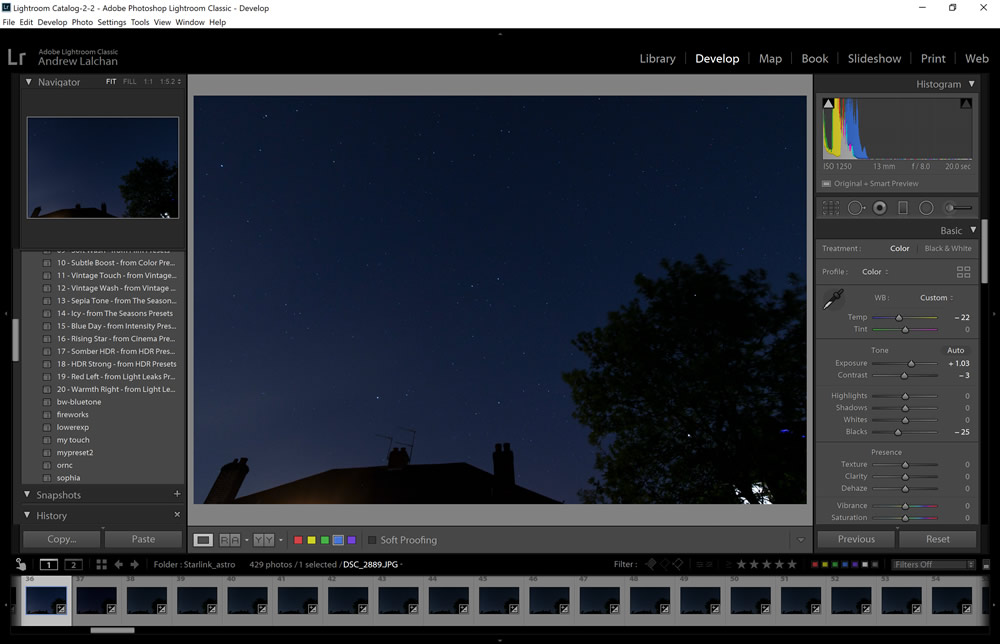
- Import the photographs you took into Lightroom, edit the first photograph, I normally just edit the white balance, with the temperature a touch to the blue, +1 stop of exposure and adjust the blacks and shadows if needed. Then edit the sharpening under the details panel and set to 75. Also in the lens correction panel, tick on Remove Chromatic Aberration and Enable Profile Correction, if it doesn’t select your lens then choose it from the dropdown. This will flatten the image.
- Select all images by pressing shift and clicking on the last one, this will highlight all of them. The button next to Reset (bottom right) should now have changed to Sync.. Click on this and up will pop the Synchronise Settings panel, click on White Balance, Basic Tone, Sharpening and Lens Corrections and leave the others unticked. Then select the Synchronise button, the settings will then be copied to all the other photos.
- Now you need to export the images for the StarStaX software, from the File menu you should see Export, choose your normal settings but leave the Image Sizing unticked. Now export the images to a separate folder on your computer, ready for the next part.
StarStaX Software
The StarStaX software is free and can be downloaded here for Windows & Mac, it is used to stack the images on top of each other to create the trails. Below are the steps to do this.
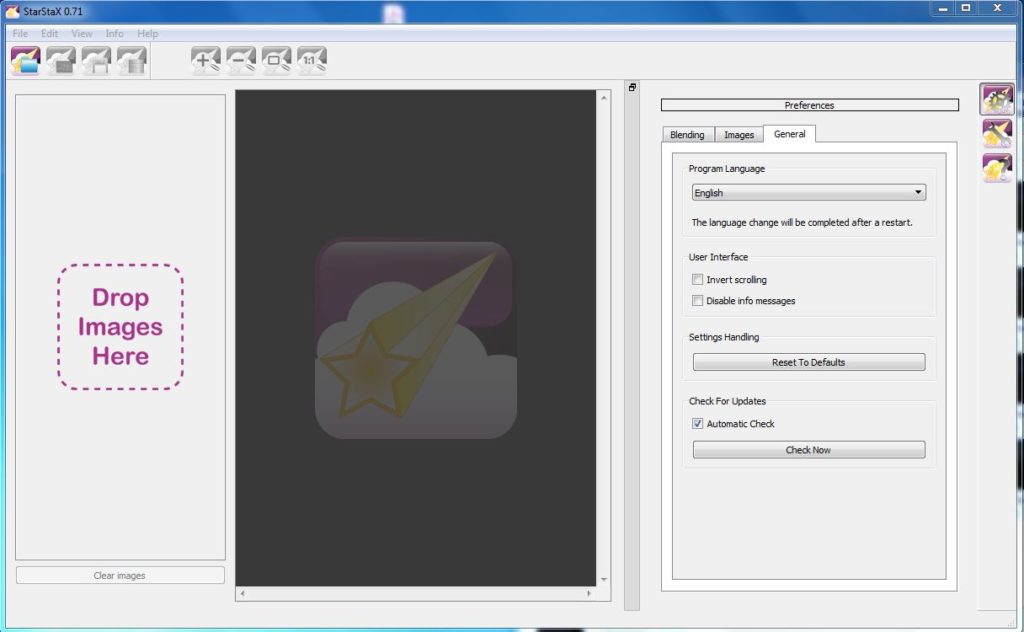
- When you first load up the software you should see a Drop Images Here message on the left, if you select the images that you exported in lightroom excluding the dark photo and just drag and drop them on the message. You should then see them listed on the left panel.
StarStax – Add your images - Now select the dark photo by clicking on the 2nd icon on the top left below the menu, you can then select your dark image and its name will appear on the list on the left below.
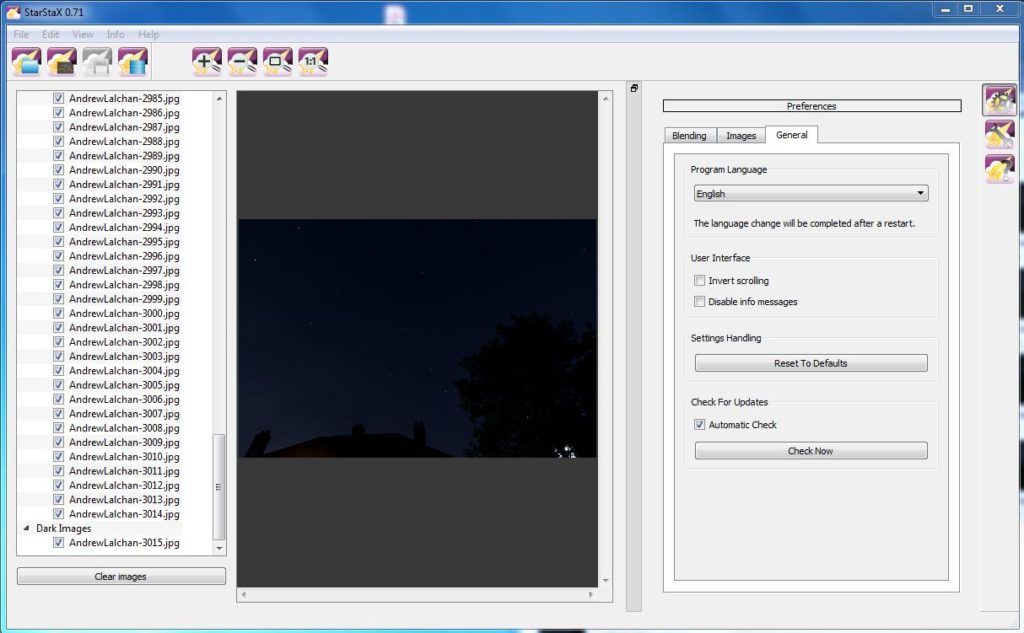
StarStax – Add your dark image - On the far right-hand side you should see the preference panel, one of the settings that need to be ticked is on the Blending tab called Subtract Dark Images.
- You are now ready to start processing, you start this by clicking on the Edit menu and select Start Processing. This may take a while depending on the size and the number of photos. You will see the image build up in the middle panel. You can also experiment with the gap-filling blending mode.
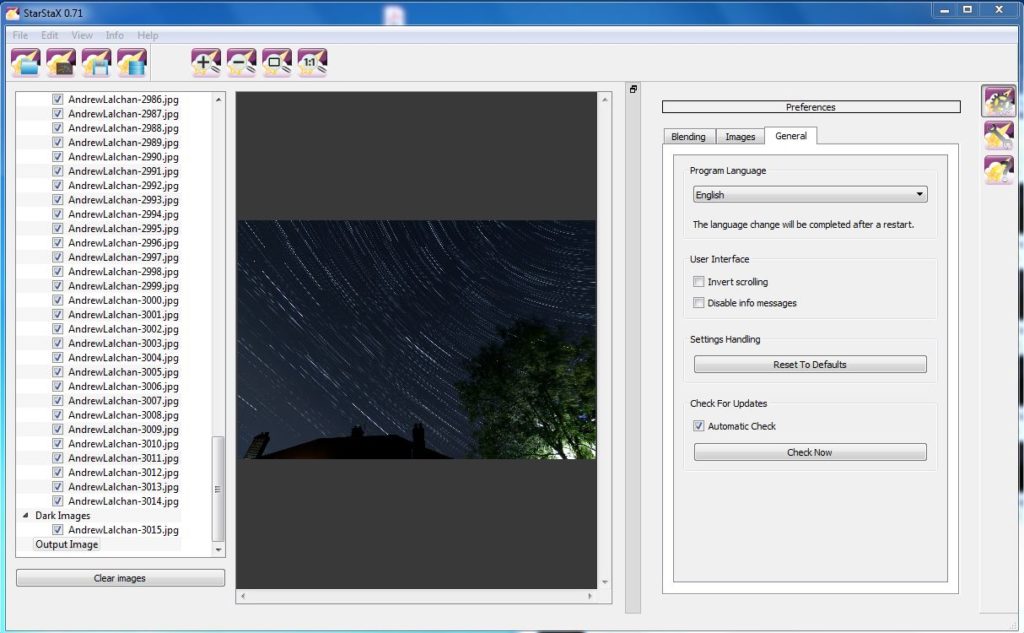
StarStaX – Completed processing - Once it has completed, click on the File menu and choose Save As and choose your location.
And that’s it, you should now have your first star trail photograph. You can experiment with the blending modes in the StarStaX software to get different effects. On another tutorial to come, I will show you how to create a timelapse video of the star trails and another with the best apps to use if you are interested in the night sky.
If this has been of help to you leave a comment in the box below. Thanks for reading, be sure to sign up to my newsletter to hear about future tutorials.
We hope to restart our Astronomy workshops in Cassiobury Park, Watford after the summer so, follow our Watford Meetup group to hear about it first.
Links
StarStax Software – https://markus-enzweiler.de/software/starstax
Watford Meetup Group – https://www.meetup.com/Watford-Photography-Meetup
Instagram – http://www.instagram.com/alalchan
Flickr – https://www.flickr.com/photos/alalchan
Twitter – http://www.twitter.com/alalchan